

Installing a smart thermostat can feel like launching a rocket to the moon, but it’s much simpler. You can transform your Clermont home into a more efficient and convenient living space with just a few steps. So, what do you need to get started? Let’s break down the process, ensuring you’re well-equipped for this upgrade.
Choosing the Right Smart Thermostat for Your Home
When it comes to choosing the right smart thermostat for your home, it’s vital to take into account your specific needs and lifestyle.
Start by evaluating your heating and cooling habits. Do you prefer a consistent temperature, or do you adjust settings frequently? If you’re often away, consider a model with features like geofencing that adjusts based on your location.
Next, think about compatibility. Confirm the thermostat works with your HVAC system and smart home devices. User-friendliness is important, too—look for a model with an intuitive app or interface.
Energy efficiency is a big plus; many smart thermostats can help you save on energy bills through learning algorithms. Additionally, ensure that your thermostat aligns with high-quality products for optimal performance.
Finally, check customer reviews and warranties to gauge reliability and support. By considering these factors, you’ll find a smart thermostat that enhances your home’s comfort and efficiency.
Tools and Materials Needed for Installation
Installing a smart thermostat requires a few essential tools and materials to guarantee a smooth process. First, gather a screwdriver set, which is vital for removing your old thermostat and securing the new one.
You’ll also need a drill for any necessary wall anchors. A voltage tester is essential to verify safety by checking for power before you start working on the wiring.
Additionally, have a level on hand to make sure your new thermostat is properly aligned. You might want wire strippers for adjusting the thermostat wires, and electrical tape to secure connections.
Finally, keep your user manual nearby; it’ll guide you through the specifics of your chosen thermostat model. With these tools and materials ready, you’ll set yourself up for a successful installation experience. Consider scheduling maintenance services with a qualified HVAC contractor after installation to enhance your comfort and efficiency.
Preparing Your HVAC System for Smart Thermostat Installation
Before you engage in installing your new smart thermostat, it’s important to prepare your HVAC system to guarantee a seamless integration.
Taking a few moments to assess your system can save you time and frustration later. Here’s what you should do:
- Check your current thermostat compatibility: Verify your existing system supports smart thermostats. Look for features like a C-wire, which is often necessary for proper functionality.
- Inspect your HVAC system: Look for any signs of wear or malfunction. A properly functioning system is vital for your smart thermostat to operate effectively.
- Clean the area around your thermostat: Dust and debris can interfere with the sensor’s performance, so make sure the space is clean and unobstructed. Additionally, ensure that your system is in good working condition to maximize the benefits of your new thermostat.
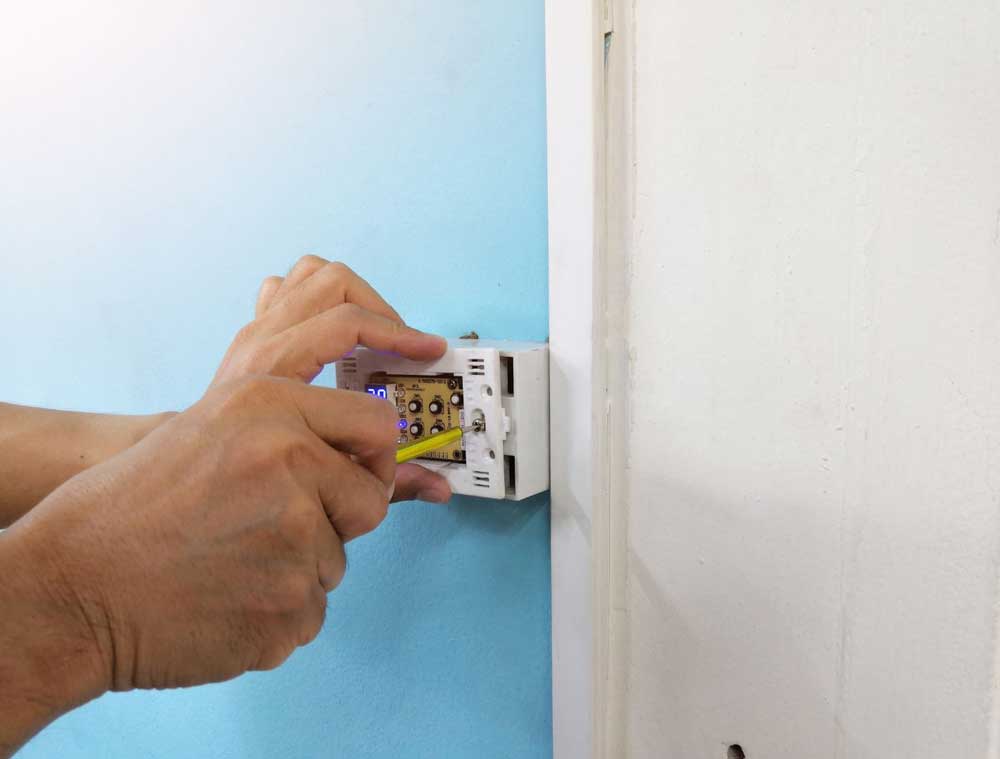
Step-by-Step Installation Process
Successfully installing your smart thermostat involves a straightforward step-by-step process.
First, turn off your HVAC system to guarantee safety. Next, remove the old thermostat by unscrewing it from its wall plate and carefully disconnecting the wires. Label each wire according to its terminal to avoid confusion later.
Once you’ve removed the old unit, mount the new thermostat’s wall plate, making sure it’s level. Connect the labeled wires to the corresponding terminals on your new thermostat. Secure the wires and attach the thermostat to its wall plate.
After that, turn your HVAC system back on and power up your new thermostat. Follow the manufacturer’s instructions for any initial setup, making sure everything is correctly connected. It’s beneficial to consult with certified HVAC technicians to ensure optimal installation and performance.
Finally, double-check that the thermostat is functioning by adjusting the temperature and confirming that your system responds accordingly. You’ve now completed the installation!
Configuring and Optimizing Your Smart Thermostat Settings
Configuring your smart thermostat settings is essential for maximizing energy efficiency and comfort in your home. Start by setting your desired temperature range for different times of the day. This helps maintain a comfortable environment while saving energy when you’re away.
Next, utilize energy-saving modes, which optimize your HVAC system’s performance without sacrificing comfort.
Here are a few tips to help you get the most out of your smart thermostat:
- Set a schedule: Program your thermostat to adjust temperatures based on your daily routine.
- Enable geofencing: Use your smartphone’s location to adjust settings when you leave or return home automatically.
- Monitor energy usage: Regularly check your energy reports to see where you can improve efficiency.
Conclusion
By following these steps, you’re not just installing a smart thermostat—you’re embracing a new level of comfort and efficiency in your Clermont home. Imagine coming home to a perfectly heated or cooled space, all while saving on energy bills. It’s like your thermostat knows your schedule better than you do! With the right setup, you’ll enjoy a cozy environment that adjusts to your needs, making every day feel just right. Now, isn’t that a pleasant coincidence?